Taking a screenshot on your Dell laptop is simple and quick. You can capture your screen in a few easy steps.
Screenshots are useful for saving information, troubleshooting, or sharing what you see on your screen. If you need to show someone an error message or save a copy of an online receipt, a screenshot comes in handy. Dell laptops offer several ways to take screenshots, whether you use built-in shortcuts or external tools.
This guide will help you understand different methods to capture your screen. You don’t need special software; your Dell laptop has everything needed. Let’s explore these methods together and find the best one for you.
Credit: www.dell.com
Using Keyboard Shortcuts
Taking a screenshot on a Dell laptop is easy with keyboard shortcuts. These shortcuts are quick and effective. You can capture your entire screen or just parts of it. Let’s look at two simple methods.
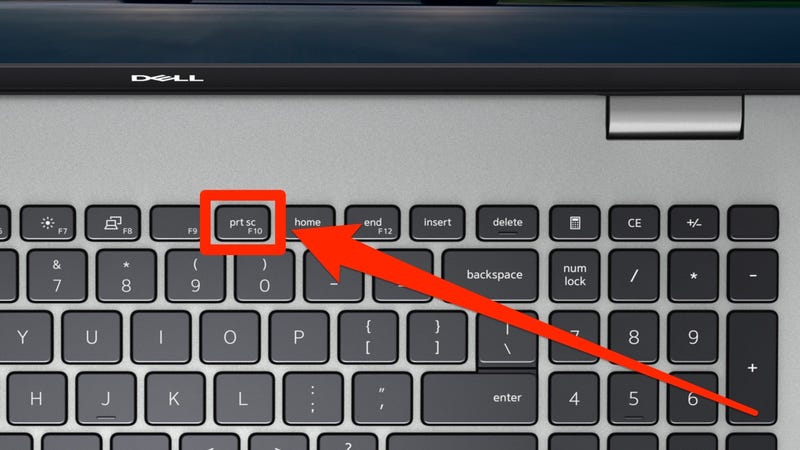
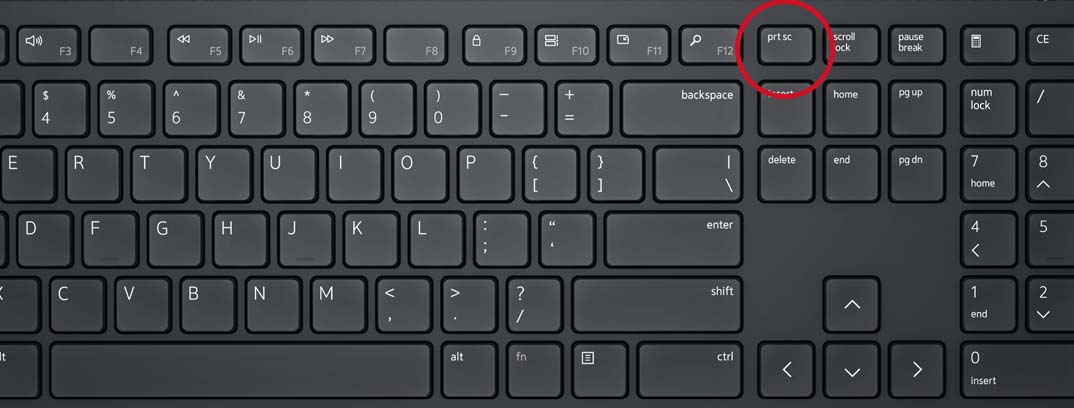
Prtsc Key
The PrtSc key, short for Print Screen, is the most common method. Press the PrtSc key to capture the entire screen. This action copies the screenshot to your clipboard. Open an image editor and paste it there. Save the image to your desired location.
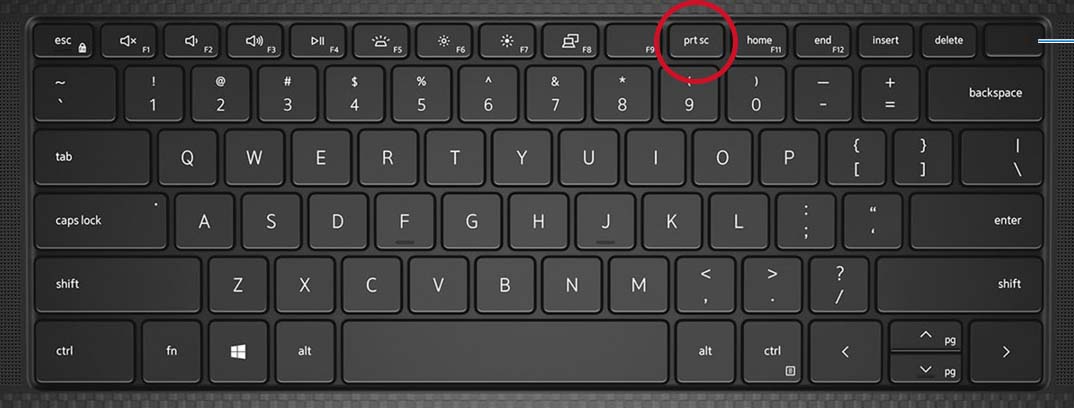
Alt + Prtsc
Use Alt + PrtSc to capture only the active window. Hold the Alt key and press the PrtSc key. This shortcut captures the window you are working on. The screenshot is copied to the clipboard. Open an image editor and paste the image. Save the file to keep the screenshot.
Credit: www.dell.com
Using Windows Snipping Tool
Capture screenshots on your Dell laptop effortlessly with Windows Snipping Tool. Open the tool, select the snip type, and capture the desired area. Save the screenshot to your preferred location.
Taking screenshots on your Dell laptop can be incredibly useful. Whether you need to capture a funny meme or save an important document, the Windows Snipping Tool is a handy feature. Let’s dive into how you can use it effectively. ###Opening Snipping Tool
Start by opening the Snipping Tool. Click on the Start button on your taskbar. Type “Snipping Tool” into the search bar. Once you see it in the results, click to open it. Pro Tip: Pin it to your taskbar for quick access next time! ###Capturing Screenshot
Ready to capture your screen? Click on the “New” button in the Snipping Tool. Your screen will dim, and you’ll be able to select the area you want to capture. Click and drag your mouse to create a rectangular snip. Release the mouse button to capture your screenshot. What do you need the screenshot for? If it’s for a tutorial, consider using the free-form snip option for more flexibility. Once captured, you can save it by clicking the “Save Snip” button. Choose your preferred location and file format, and you’re done! Helpful Hint: Use the “Delay” feature to capture screenshots with a few seconds delay, giving you time to set up your screen perfectly. By following these simple steps, you’ll be a screenshot pro in no time.Using Windows Game Bar
To take a screenshot on your Dell laptop, use the Windows Game Bar. Press Win + G, then click the camera icon. This saves the screenshot to your computer.
Taking screenshots on your Dell laptop can be a breeze with the Windows Game Bar. This nifty feature, designed primarily for gamers, offers a quick and straightforward way to capture your screen. Whether you need to save an error message or share a funny meme, the Game Bar has you covered.Activating Game Bar
First, ensure the Game Bar is activated. Press the Windows key + G to open the Game Bar. A prompt will ask if you want to open the Game Bar; select “Yes, this is a game.” Even if you’re not gaming, this step is crucial to activate the feature.Taking Screenshot
Once activated, taking a screenshot is simple. Press the Windows key + Alt + PrtScn simultaneously. Your screen will briefly dim, confirming the screenshot is captured. These screenshots are automatically saved in your “Videos” folder under “Captures.” Have you ever struggled with capturing the perfect moment on your screen? The Game Bar eliminates that frustration with just a few clicks. Experiment with it today and see how it simplifies your workflow.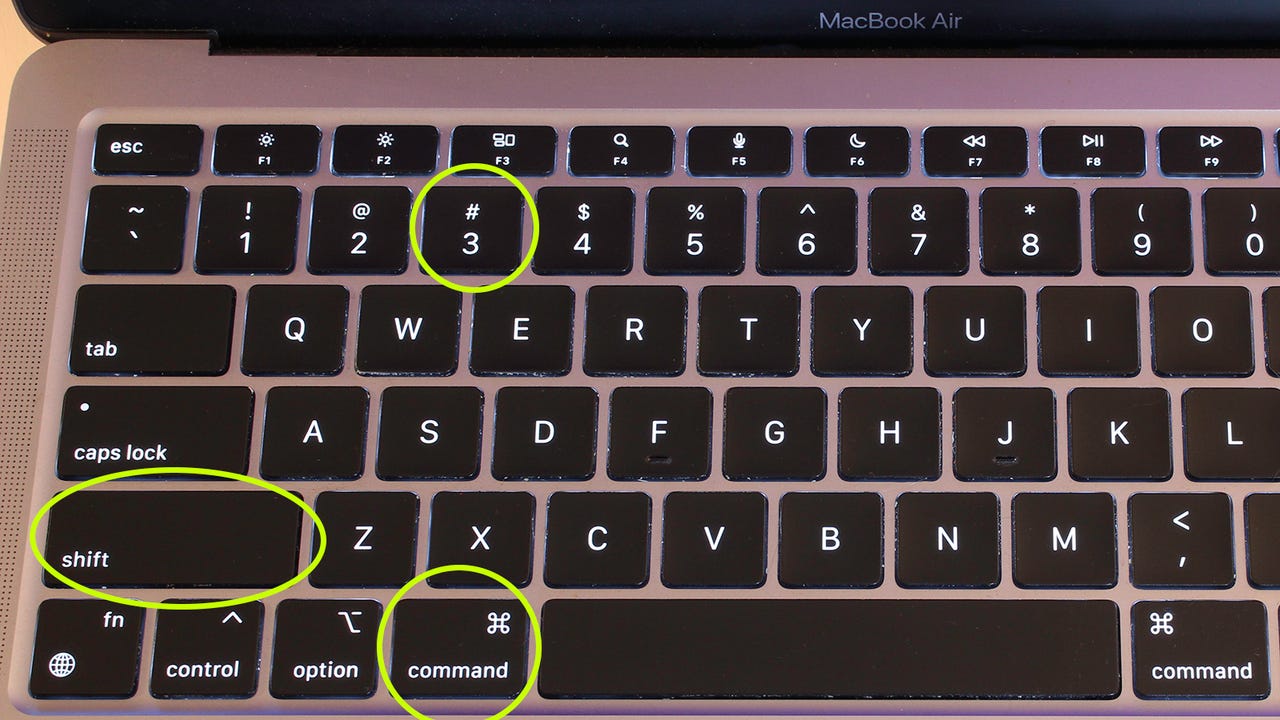
Credit: www.zdnet.com
Using Third-party Software
Taking screenshots on a Dell laptop can be done with built-in tools. But, third-party software offers more features and flexibility. These tools can capture scrolling windows, edit screenshots, and share them easily.
Popular Tools
Several third-party screenshot tools are popular and reliable. Snagit, Lightshot, and Greenshot are some top choices. Each offers unique features to enhance your screenshot experience. These tools are user-friendly and widely recommended.
Installation Steps
Installing these tools is simple. First, visit the official website of the tool you choose. Download the installer file. Open the downloaded file and follow the on-screen instructions. Once installed, open the tool and explore its features. Customize settings to suit your needs.
Saving Screenshots
Taking a screenshot on your Dell laptop is a useful skill, but knowing where your screenshots are saved is equally important. This section will guide you through understanding the default save location and how you can change it to suit your needs.
Default Save Location
When you take a screenshot on your Dell laptop, it’s automatically saved to a specific folder. By default, screenshots are stored in the “Screenshots” folder within the “Pictures” directory. This makes it easy to find all your screenshots in one place.
To locate your screenshots, open the “File Explorer” and navigate to “Pictures”. You will see a “Screenshots” folder containing all the images you’ve captured.
However, this default location might not always be convenient. If you work on different projects, you might want to save screenshots in separate folders for better organization.
Changing Save Location
Changing the save location of your screenshots is straightforward. This can help you manage your files more efficiently and keep your workspace organized.
First, decide on a new location for your screenshots. You might create a new folder on your desktop or within your project-specific directories.
To change the save location, press the “Windows key + Print Screen”. Your screenshot will be saved to the default folder. Now, move this file to your desired location by simply dragging it.
Alternatively, you can use third-party software to capture and save screenshots directly to your chosen folder. These tools often provide more customization options.
Have you ever found yourself searching endlessly for a screenshot you took last week? Changing the save location can save you time and reduce frustration.
Do you find the default save location convenient, or do you prefer organizing your screenshots in different folders? Share your thoughts and tips below!
Editing Screenshots
Editing screenshots on your Dell laptop can enhance their clarity and usefulness. Whether you need to highlight important details or add text, editing screenshots is simple. Let’s explore the basic and advanced editing options.
Basic Edits
Basic edits can make your screenshot more informative. Use the built-in Snipping Tool or Snip & Sketch app on your Dell laptop. These apps allow you to crop, resize, and annotate your screenshot. Cropping removes unnecessary parts. Resizing adjusts the dimensions. Annotating lets you draw or write on the screenshot. Basic edits are quick and improve the visual appeal.
Advanced Edits
For advanced edits, use software like GIMP or Photoshop. These programs offer more tools for detailed editing. You can adjust colors, add layers, or apply filters. Advanced edits help in creating professional-quality screenshots. They are useful for presentations, tutorials, or detailed reports. Experiment with different tools to see what works best for your needs.
Sharing Screenshots
Sharing screenshots is easy and can be done in different ways. Whether you want to share through email or social media, the steps are simple. Let’s explore the options.
Email Sharing
To share a screenshot via email, first, capture the screenshot. Press the “PrtScn” key. Open your email client and start a new message. Paste the screenshot by pressing “Ctrl + V.” Add a recipient and subject line. Click “Send.” Your screenshot is now shared.
Social Media Sharing
Sharing a screenshot on social media is quick. Capture the screenshot using the “PrtScn” key. Open the social media app of your choice. Start a new post or message. Paste the screenshot with “Ctrl + V.” Add a caption if needed. Click “Post” or “Send.” Your friends and followers can now see it.
Troubleshooting
Taking a screenshot on a Dell laptop is usually easy. But sometimes, you might face problems. Don’t worry. This section will help you solve common issues. Let’s look at some problems and their fixes.
Common Issues
One common issue is the screenshot not saving. You press the keys, but nothing happens. Another problem is the screenshot appearing blank. Also, some users find that the screenshot feature doesn’t work at all.
Fixes
First, check the keyboard. Make sure the keys are working. Try pressing “Fn” with the “Print Screen” key. This helps in most cases. Next, check if the screenshot is being saved in a different folder. Open “This PC” and search for the screenshot.
If the screenshot is blank, update your graphics drivers. Go to the Device Manager. Find your graphics driver and update it. This can solve many issues. If the problem persists, try restarting your laptop. This can fix small bugs and glitches.
For those who find the screenshot feature not working at all, use a different tool. Many free tools can take screenshots. Snipping Tool and Snip & Sketch are good options. They come pre-installed on most Windows laptops.
Frequently Asked Questions
How To Take A Screenshot On Dell?
Press “PrtScn” to capture the entire screen. For an active window, press “Alt + PrtScn”. Save in Paint.
How Do I Manually Take A Screenshot On My Laptop?
Press the “Print Screen” (PrtScn) key to capture the entire screen. Use “Alt + Print Screen” to capture the active window. Paste the screenshot into an image editor.
Which Key Do You Press To Take A Screenshot On A Laptop?
Press the “PrtSc” key to take a screenshot on a laptop. For Windows, use “Windows + Shift + S” for a snipping tool.
What Are The Three Ways To Take A Screenshot?
Use the Print Screen key, the Snipping Tool, or press Windows + Shift + S to take a screenshot.
Conclusion
Taking a screenshot on your Dell laptop is easy. Use the Print Screen key. Save it with Paint. Try Windows + PrtScn for direct saving. Snipping Tool offers more options. Practice and you’ll get better. Follow these simple steps. Enjoy capturing your screen moments.
Share them with ease.