Removing a printer from your Windows 10 computer can be easy. Follow these simple steps to ensure the printer is fully uninstalled.
Why Remove a Printer?
Sometimes, you need to remove a printer. Maybe it is old or broken. Or you got a new printer. Removing the old one can help your computer run better.
Steps to Remove a Printer in Windows 10
Follow these steps to remove a printer:
- Open Settings: Click on the Start menu. Then click on Settings.
- Go to Devices: In the Settings window, click on Devices.
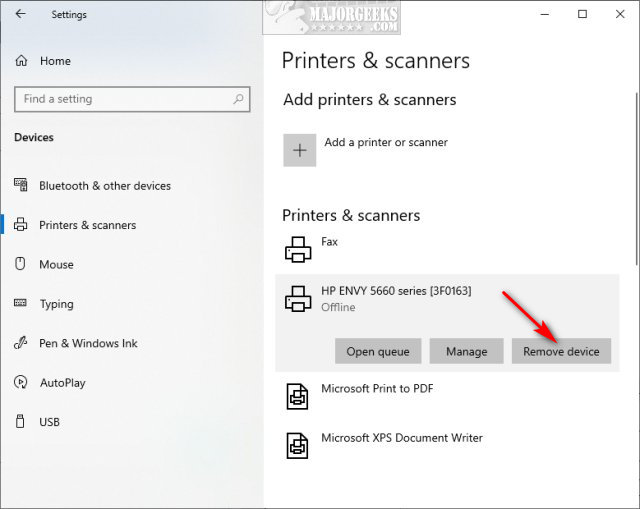
- Printers & Scanners: Click on Printers & Scanners on the left side.
- Select Printer: Find the printer you want to remove. Click on it.
- Remove Device: Click on Remove Device. Confirm you want to remove it.
These steps should remove the printer from your list.
Remove Printer Drivers
Sometimes, you need to remove printer drivers too. Here is how:
- Open Print Management: Press Windows key + R. Type printmanagement.msc and press Enter.
- Go to Print Servers: In the left panel, click on Print Servers. Then click on your computer name.
- Drivers: Click on Drivers. You will see a list of printer drivers.
- Select Driver: Find the driver for the printer you removed. Right-click on it.
- Remove Driver Package: Click on Remove Driver Package. Confirm you want to remove it.
This will delete the printer driver from your computer.
Use the Control Panel
You can also use the Control Panel to remove a printer. Here are the steps:
- Open Control Panel: Click on the Start menu. Type Control Panel and press Enter.
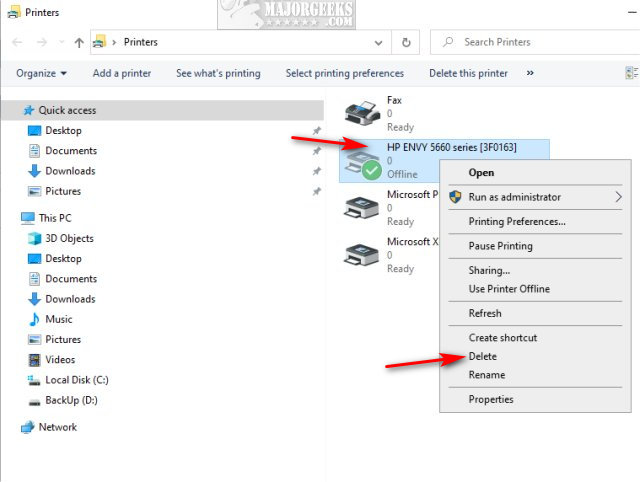
- Devices and Printers: Click on Devices and Printers.
- Select Printer: Find the printer you want to remove. Right-click on it.
- Remove Device: Click on Remove Device. Confirm you want to remove it.
This method also helps to remove the printer from your system.

Clear Printer Queue
Before removing a printer, clear the printer queue. Here is how:
- Open Services: Press Windows key + R. Type services.msc and press Enter.
- Find Print Spooler: Scroll down to find Print Spooler. Right-click on it.
- Stop Print Spooler: Click on Stop.
- Clear Files: Open File Explorer. Go to C:\Windows\System32\spool\PRINTERS. Delete all files in this folder.
- Start Print Spooler: Go back to Services. Right-click on Print Spooler. Click on Start.
Now, the printer queue is clear. You can remove the printer easily.
Check for Printer Software
Printers often come with software. Removing the printer also means removing the software. Here is how:
- Open Settings: Click on the Start menu. Then click on Settings.
- Go to Apps: In the Settings window, click on Apps.
- Find Printer Software: Scroll down to find the software for your printer.
- Uninstall: Click on the software. Then click on Uninstall. Follow the prompts to remove it.
This removes any extra software from your computer.
Restart Your Computer
After removing the printer and its software, restart your computer. This helps to make sure all changes take effect. Here is how:
- Click Start Menu: Click on the Start menu.
- Select Power: Click on Power.
- Restart: Click on Restart.
Your computer will restart. It should now be free of the old printer and its software.
Frequently Asked Questions
How Do I Completely Uninstall A Printer On Windows 10?
Go to “Devices and Printers,” right-click the printer, and select “Remove device. “
Why Can’t I Remove My Printer In Windows 10?
You might need admin rights. Or a print job is stuck in the queue.
How Do I Delete Printer Drivers In Windows 10?
Open “Print Management,” find the driver, right-click, and choose “Remove Driver Package. “
Can I Remove A Printer Using Command Prompt?
Yes. Use “printui. exe /dl /n” followed by the printer name.
Conclusion
Removing a printer in Windows 10 is simple. Follow these steps to remove the printer, drivers, and software. This helps your computer run better. Restart your computer after removing everything. Now you can enjoy a clean, printer-free computer.